I was going to write out my reasons for building a sit/stand before realizing that if you’re reading this article then you’ve probably already read up on the why in other, more interesting places.
I will show you the how on adding sit/stand capabilities to an existing desk.
Items required:
- 3M Easy Adjust Desk Mount Monitor Arm
- Mount Factory Articulating Single Monitor Desk Mount
- Ergotron Quick Release LCD Bracket
- Monoprice 200x200mm Bracket Universal Adapter
- 36”x18” white wooden board, Home Depot
Sitting
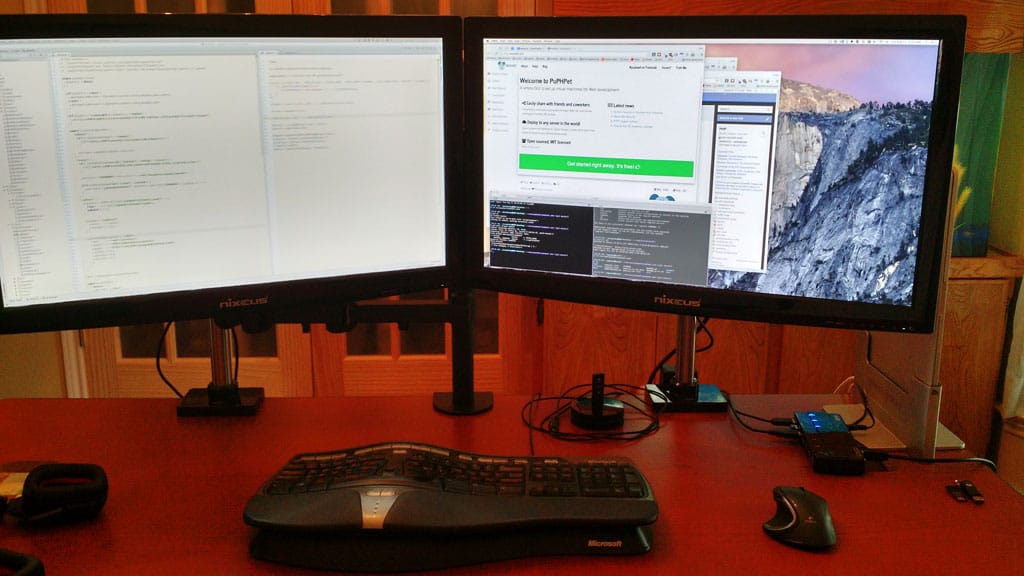
This is how my desk looked before. It’s a fairly nice, flat desk. I have two 27” Nixeus monitors, keyboard and mouse.
 |
|---|
| 02.jpg |
Nothing extremely fancy, but it is mostly comfortable to work with for extended periods of time. At least, it was until my body starting complaining.
In the right corner you can see my MBP in its vertical dock, taking up minimal space. The laptop is not actually powering the monitors, I recently built a Hackintosh desktop that is quite a bit more powerful. I may write an post on it later on.
This picture already shows my monitors mounted to the 3M desk mounts. I purchased two, but they have a single mount that you can place 2 monitors on. I decided to go with two separate mounts because I plan to purchase a 3rd monitor in the next few months.
Between the two mounts you can see the Mount Factory desk mount. It can be turned left or two and also has an elbow in the middle to further compress it. Right now it is turned behind the left monitor, out of the way when I am sitting down.
 |
|---|
| 03.jpg |
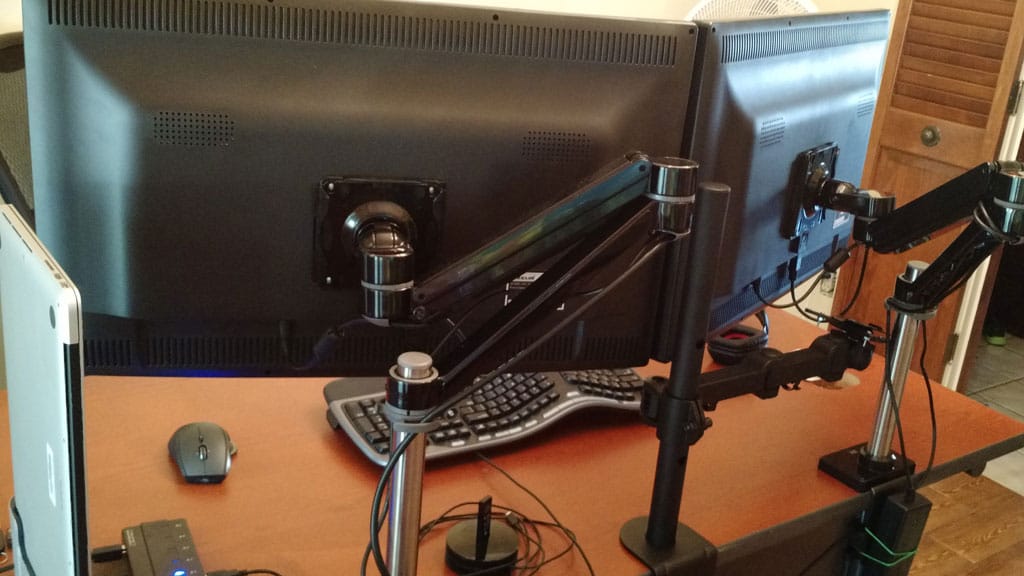
This is what the arms look like behind the desk. The two monitor mounts are fully articulating. They can go up, down, around. The range of motion on them is quite nice and provides a great range of positioning. The work by using a counterweight system - you can actually move the 18lbs monitors around with a single finger, and they will stay where you want them to. I can also turn them into portrait mode.
They are height-adjustable via the mounting pole, in case you need them a little lower then you are standing up.
They attach to the desk via a fairly powerful clamp that you can tighten. Once you tighten it, it is rock solid. I am completely confident in their ability to not drop my monitors, and not loosen their grip on my desk.
The Mount Factory mount, in the middle, is actually for my keyboard and mouse tray.
Standing
 |
|---|
| 04.jpg |
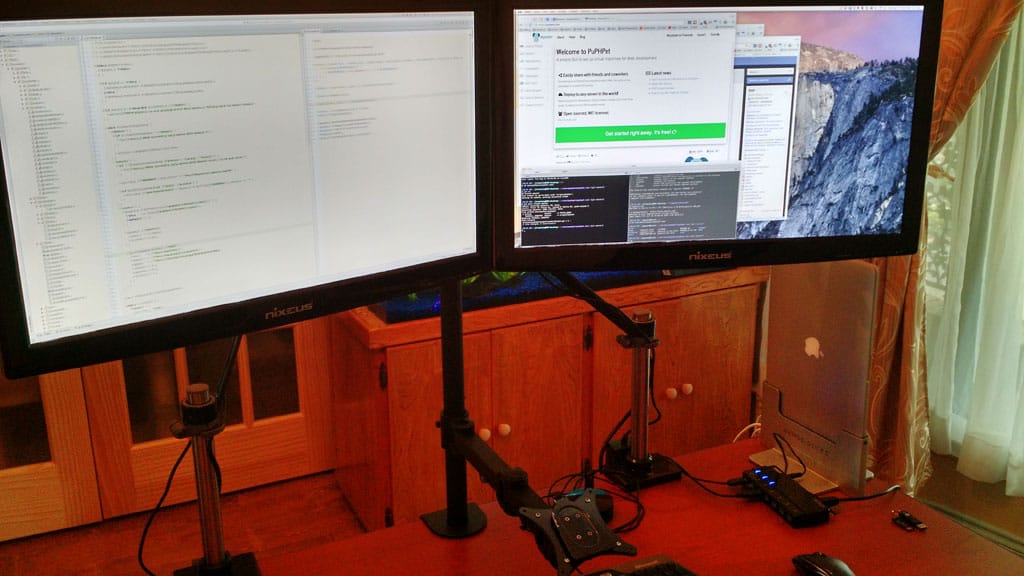
Here you can see both monitor arms extended to their full height. I did this with a single finger! There are some minor adjustments once they are at your desired height, namely to remove the gap between the two bevels, but it is quite easy to do.
 |
|---|
| 05.jpg |
I have also extended the keyboard arm. I will show detail on it in a second.
This is what the arms look like when fully extended. They do not go further than this. You can see there is maybe 1” left in the monitor poles that I can use to further raise the monitors a little higher.
 |
|---|
| 06.jpg |
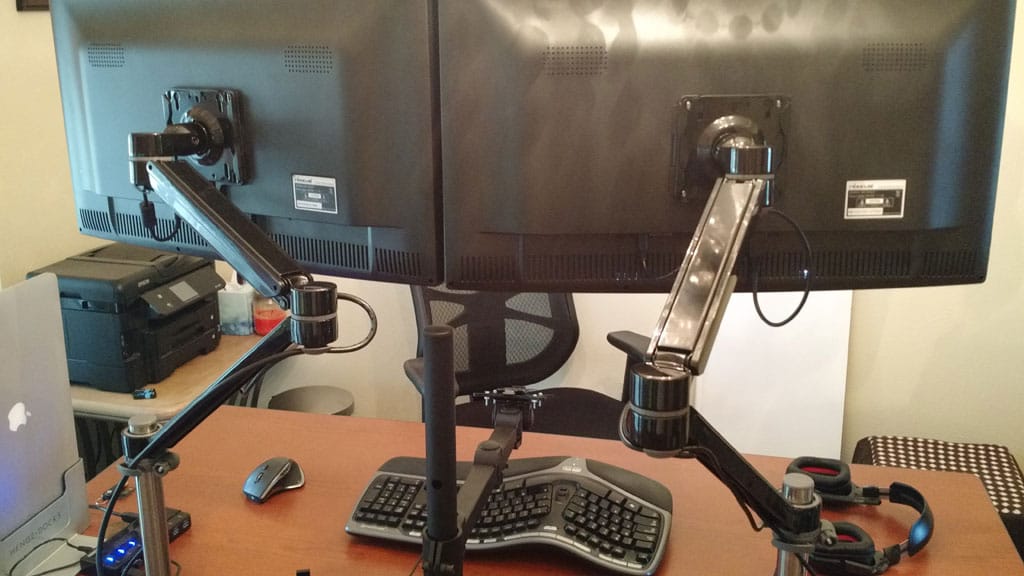
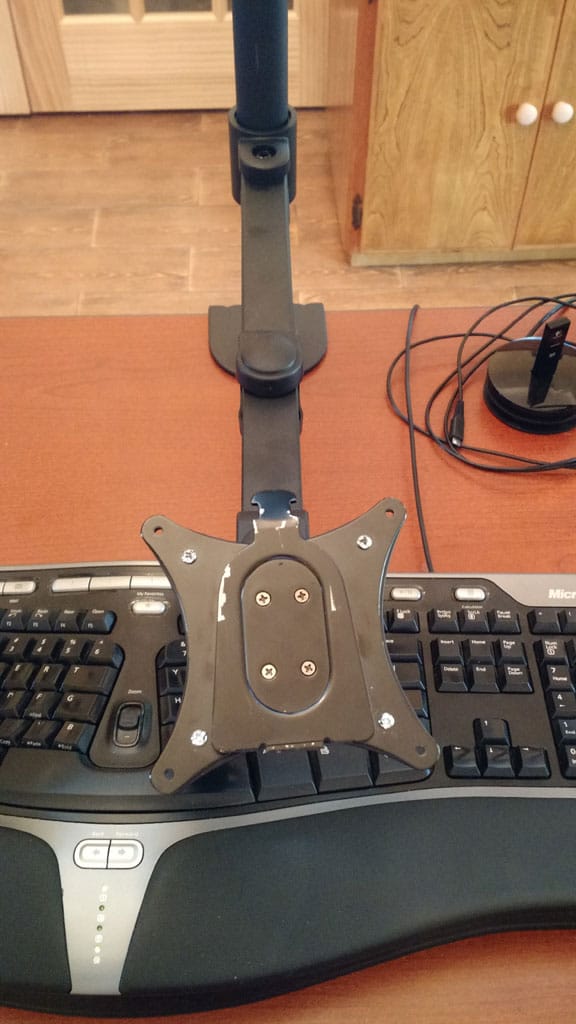
This is the Mount Factory arm, extended. It also has the Ergotron Quick Release LCD Bracket attached to it. The arm itself is VESA compatible - remember they are for monitors and other VESA-compatible items. I have attached the quick release bracket to it because I do not want the keyboard tray to be in the way when I am sitting down. It will make sense in a second.
Ignore the slight scratches on it. I tried to force it on in the incorrect manner when I first purchased it. If I had read the very simple instructions it would still be in great shape.
 |
|---|
| 07.jpg |
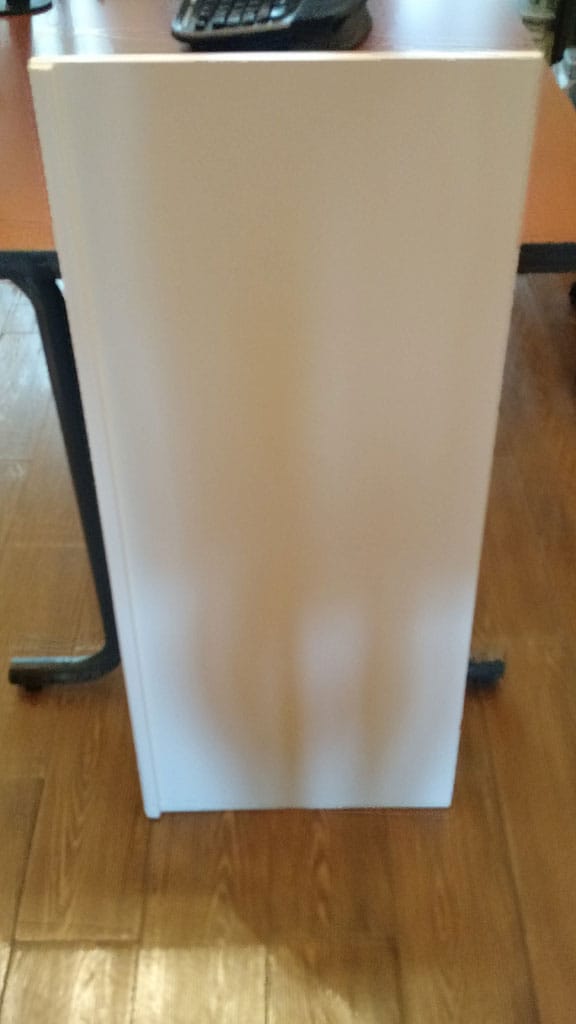
This is the keyboard/mouse tray. It is a simple wooden tray I bought from Home Depot for $5. It is a little hard to see (shitty cellphone camera) but on the left (bottom) side I glued a small wooden strip to prevent items from falling off the tray.
 |
|---|
| 08.jpg |
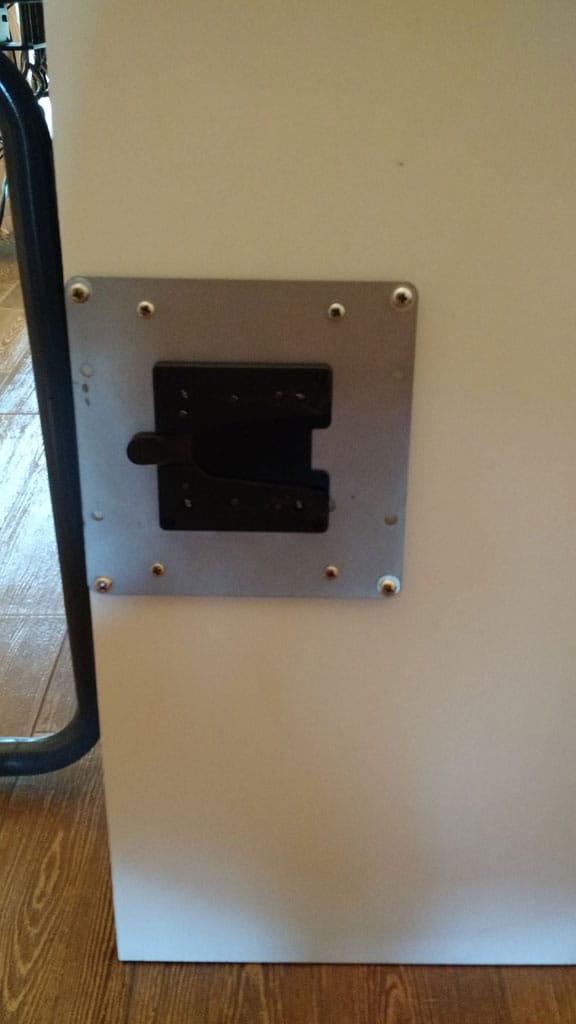
This is the back of the keyboard tray. The quick release bracket is the black item. The big gray plate is the Monoprice adapter. I did it this way because the keyboard tray is quite large and I wanted to have more grip across a larger surface area. Nothing fancy to attach, just some short screws.
The idea behind the bracket is I keep the keyboard tray out of the way in a corner of my office when I am sitting down. When I want to stand up, I simply slide it on to the keyboard arm. To release it I press down on the small tab and slide the tray off.
 |
|---|
| 09.jpg |
This is my desk in standing mode. The monitor arms are extended, the keyboard tray is attached and I have placed my keyboard and mouse on it.
 |
|---|
| 10.jpg |
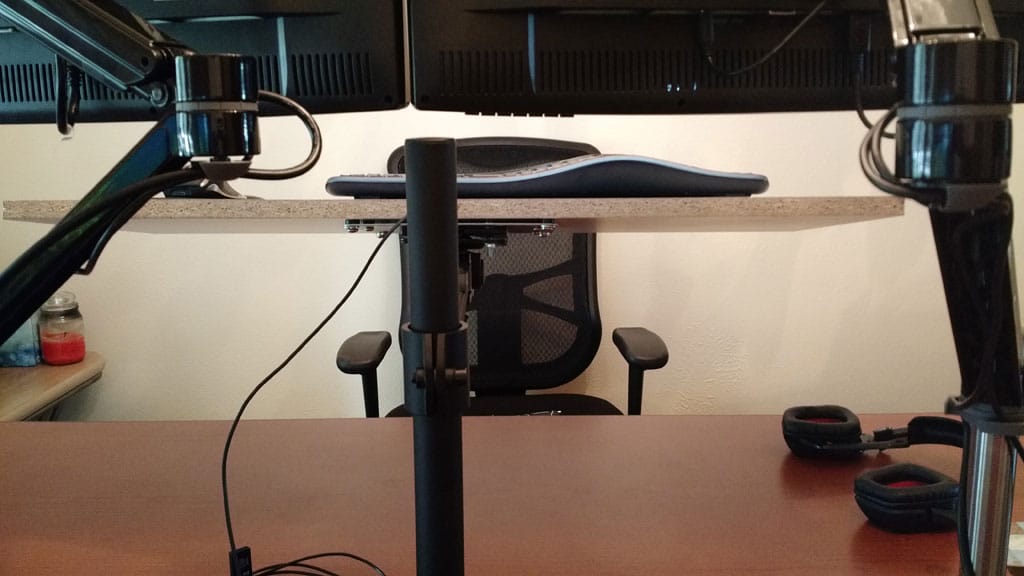
From behind you can see how high the monitors and keyboard are raised. For reference, I am 6’0” and everything is at a fairly comfortable level for me. Remember that the monitor arms cannot go any higher, so if you are much taller than me you should keep this in mind. 3M may sell some longer poles so you can adjust them even higher. Check with them!
Total cost
If you go with all the same parts I did, and only have one monitor it will cost a total of $226.65. If you go with two monitor mounts it goes up to $383.64.
Compared to most sit/stand desks on the market, you are saving over $1,000.
Of course, it will not be nearly as fancy, but it works and it really only takes about 60 seconds to go from a sitting desk to a standing desk with this setup.
Caveats
While this whole project may not have cost a ton of money, there are some minor drawbacks you should be aware of.
- Height-limited - If you are exceedingly tall, you will have to hunt for pole extensions. Again, I am 6’0” and it works for me. Anyone shorter will also be fine.
- Keyboard tray is at a slight angle - It looks to be about 15*. It is not much, but keep in mind that if your keyboard does not have rubber feet it may slide back. Your mouse will most likely need a mousepad to keep it from sliding.
- Keyboard tray is slightly wobbly - You can tighten the screw on the keyboard mount so the tray does not move forward and backward (ie, pitch). However, I do not believe the mount has screws for tightening against the roll axis. When I type, the keyboard shows a slight wobble. It is not enough to actually annoy me, or interfere with my work, but if you are extremely picky and sensitive to this things it may bother you. I would expect most people to not notice after the first few minutes of use.
RFC
If you have any suggestions to improve this setup, please let me know at any of my contact points below and I will update this post.
Signing off
This is my first DIY post on my blog. I usually write about software, but Twitter feedback was positive on the idea of writing about this particular DIY job.
Next up, I will explain how I built my Hackintosh desktop:
 |
|---|
| 11.png |
Until next time, this is Señor PHP Developer Juan Treminio wishing you adios!